Friday, May 31, 2013

Scrabble Decor


Confession time, hubby and I are huge nerds! 
Whenever we want a tv free night after the kids are asleep we play scrabble (I know l-a-m-e). 
What's even worse is that he usually beats me despite my greatest efforts.

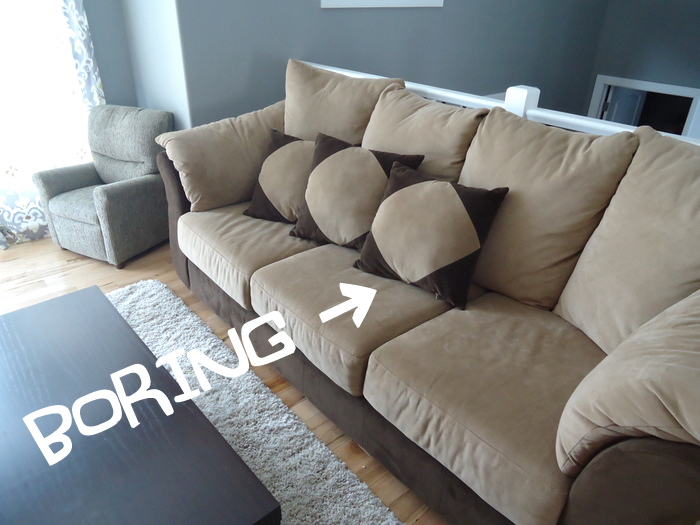
So when I found an old scrabble game at a garage sale for 50 cents I knew that I wanted to make a family name display. I cut out the game board to fit into a wooden frame that I already had and adhered the tiles with my glue gun.


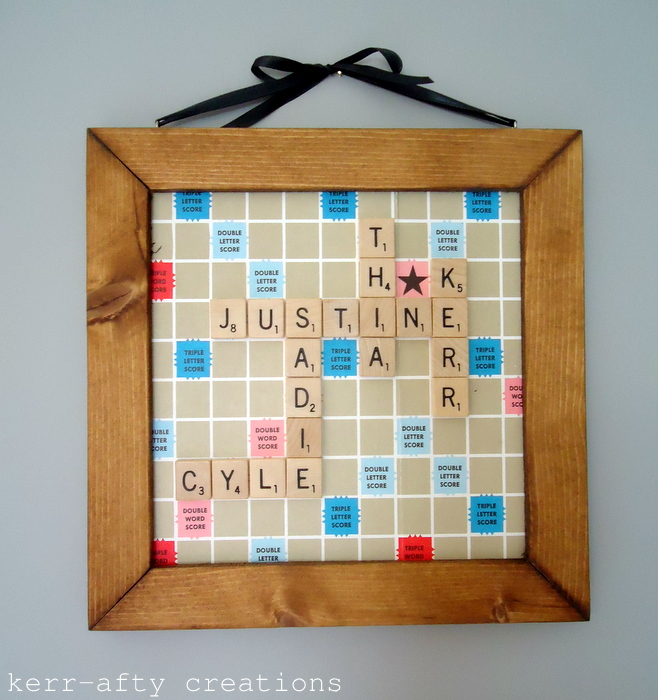
It has found a home in my living room and I love it. 
It definitely adds to my eclectic style.

I also made another wall hanging recently for the playroom downstairs. 
If you follow me on facebook you may have already seen the footprint art I made myself for Mothers day. Using both girls feet I made sweet butterflies on a canvas and wrote on one of my favorite quotes.


Happy Friday! 


linked up:
Sugar and Dots

Tuesday, May 28, 2013

Jar of Butterflies


I am so glad summer is almost here! My house is finally feeling set-up, with only a few minor things left to do. Which means I can spend more time enjoying the beautiful weather. 

I made this butterfly jar as part of my summer decor.  It's a super simple project.

To make it you will need:

A large jar
rock(s) and stick(s)
fake butterflies
fake grass
hot glue gun
optional: Brown acrylic paint and paint brush (not pictured)
                 pencil and/or long tweezers


First off paint the lid to give it an aged look. While the paint is drying hot glue bits of 'grass' to your rock(s).


I also glued a butterfly onto one rock. Then strategically place/drop the rocks into the jar.


Haha, this is where the tweezers and pencil comes in. My opening wasn't big enough for me to drop them in properly and maneuver them at all so I used the pencil and tweezers to flip things around and place them where I wanted.

Then I glued the other butterfly onto the twig and place it in between the rocks. I just let it stand freely, I didn't hot glue the stick in.


Twist the lid on and you've got a jar of butterflies for display.


 I have had this idea in my head for a long time. I am so glad I finally finished it (not that it took long). I actually painted the lid last spring and was waiting to find the perfect fake grass for cheap (which I found at the dollar store a couple of weeks ago).

On another note, this past weekend my sis and her family were here for a quick visit which was lots of fun. And today I'm doing laundry and packing for my New York trip this weekend (SO excited!). Hope to have some scheduled posts for ya while I'm away.

Happy Tuesday!


linked up:
Sugar and Dots

Sunday, May 19, 2013

insta-pics #49


I've been busy getting together with friends, having BBQ's, garage saleing, visits to the park, running, playing outside. I think summer might actually be here! It's May long so I'm still crossing my fingers that we don't get another dump of snow (it's happened a couple of times in the last few years!). Anyways on to the picture details:

1. I've been making myself a lot of veggie roll-ups lately. Dipped in hoisin sauce, so yummy!
2. Hubby went away for a week to do a course, so it was just me and my girlies.
3. One night I had a date with my sketch book watching Pitch Perfect. Love that show.
4. Propped S up with some bubbles one afternoon so I could clean my car (T was napping).
5. A vintage phone that I found at a garage sale for $2. It looks cool and it WORKS!! ..although it does take forever to dial. 
6. It's dandelion season and both girls are picking me bouquets all the time, love it!
7. I heart garage sales. Along with the goodies pictured I also bought two pieces of furniture to revamp, yay.
8. An afternoon with great friends down by the river. 
9. A cookie bouquet that I got for mothers day. It looked amazing and it was so tasty! (Those are cake pops and chocolate covered strawberries in the front, yum)

Happy Sunday!


Thursday, May 16, 2013

welcome to our home: S's room

Number two in my home tour series, S's room or what I call the BIG big girl room.
I did end up getting her a new bedspread (bought it at my favorite store, Homesense). I just love how it adds so much color to the space. Even so I plan on painting the wall that the bed is on. 
Anyways this is it for now, have a look!

Recognize the curtains? from here.


The closet is one of my favorite parts!

The left hand side is a display for all the dress up clothes. 
As well the two bins are filled with accessories, shoes, hats etc.

The right hand side I made into a cozy reading nook. 
Complete with a large body pillow, cushions and a push light. I decorated with tinker bell decals just to make the space more fun. And S loves it!


More on the large painting here
Rainbow heart art here
Nightstand and stool redo here.

You can check out her old bedroom from the last house here and here.
(I still miss those bright blue walls and the owl decals)

Happy Thursday!


Tuesday, May 14, 2013

Rosette Necklaces


Before we moved I had mentioned via instapics that I had started making fabric rosette necklaces. 
Since then I have had a couple of orders from some friends and I'm hoping to sell them at upcoming craft sales. Along with the other jewelery you may have seen on my facebook page and other projects. 
 I am also throwing around the idea of starting an Etsy page. (Should I??)
Anyways since I never actually wrote a post about them, I thought I better!


I plan to do more pattern flowers like the one on the far right which will be more unique but still keep the solid color collection available as well.


I've also started making three rosette cluster necklaces.


Which one would you pick?
Happy Tuesday!


linked up:
Sugar and Dots

Tuesday, May 7, 2013

Boring to Bright Couch Cushions


Boring...that's all these cushions are. 
And since I did have adding color as one of my new years resolutions I  figured this was another perfect opportunity.
I have been making cushion covers and little pillows since I was young (my mom actually had to tell me to stop making cushions at one point), so this was a quick fix. 
I just used a fold over cover, no zipper needed. 
You can check out this easy tutorial if you want to make your own, this is basically what I did.
Now aren't they pretty?


From drab to fab. Just look at all that color!
And now the girls are constantly playing with them, where as before they never touched em!


You may have noticed the blue pattern is the same fabric as my magnet board, a small attempt to draw the two spaces together.

Happy Tuesday!


Friday, May 3, 2013

Jillian Jiggs Pigs


 Have you ever read the book The Wonderful Pigs of Jillian Jiggs by Phoebe Gilman?
(We are huge Phoebe Gilman fans: The Balloon Tree, Grandma and the Pirates...great stpries) 

Jillian Jiggs was one of my favorite books when I was a little girl and is now one of S's favorites. I had always wanted to make the pigs but never have (there are instructions in the back of the book!).


 S had been asking to make them so I got all the supplies together and we made them while she had a friend over (and T was napping). We started off by reading the story and then got to work making the girls each a pig.

I did all the sewing while the girls picked out buttons for noses and eyes. 
Then they filled the pigs with stuffing.


I hot glued all the pieces on and sewed the cute lil tails. After that the girls were quite antsy to play with their piggies so I didn't bother putting on feet (which was just fine by them and me). 
Here are our finished pigs!


And the two happy pig owners...


 Happy Friday!

Some fineprint: This post was in no way sponsored by any company and/or person. 
It's just a great book and project that I wanted to share.


Wednesday, May 1, 2013

Fabric Magnet Board


This is my work space situated in a corner of my dining room, you can imagine how drab it was without the magnet board above the desk. 
I knew it needed something big in that vast grey space.... 

and it all started with this frame (which I got for free). I spray painted it white.


When I was last at my parents house I had asked my dad if he had some metal laying around his shop that he could cut for me. He came up with the brilliant idea to re-purpose an old washer ... you heard me, a washer! 
He cut out the side of a washer that was just sitting down at my grandpa's farm. Awesome right?
Here it is:


I then covered the metal with some fabric using spray adhesive. 
I also ended up duct taping it on the backside just to make sure it didn't go anywhere.


With some help from the hubby we glued the metal into the frame then hung it up.


After I was done making the actual magnetic board I needed some cute magnets to go with it. 
So I made some bright and colorful fabric covered button magnets.


A relatively easy project and it looks fantastic above my desk (and it's practical too).


I added this cute printable to add some more character to the space (and let the kids and hubby know that 'I love everything' about them!). 
It's actually a black and white image. You color it in so you can make it to match any space, so cool.
You can get it for free at Tried and True.


Happy Wednesday!


linked up:
Sugar and Dots